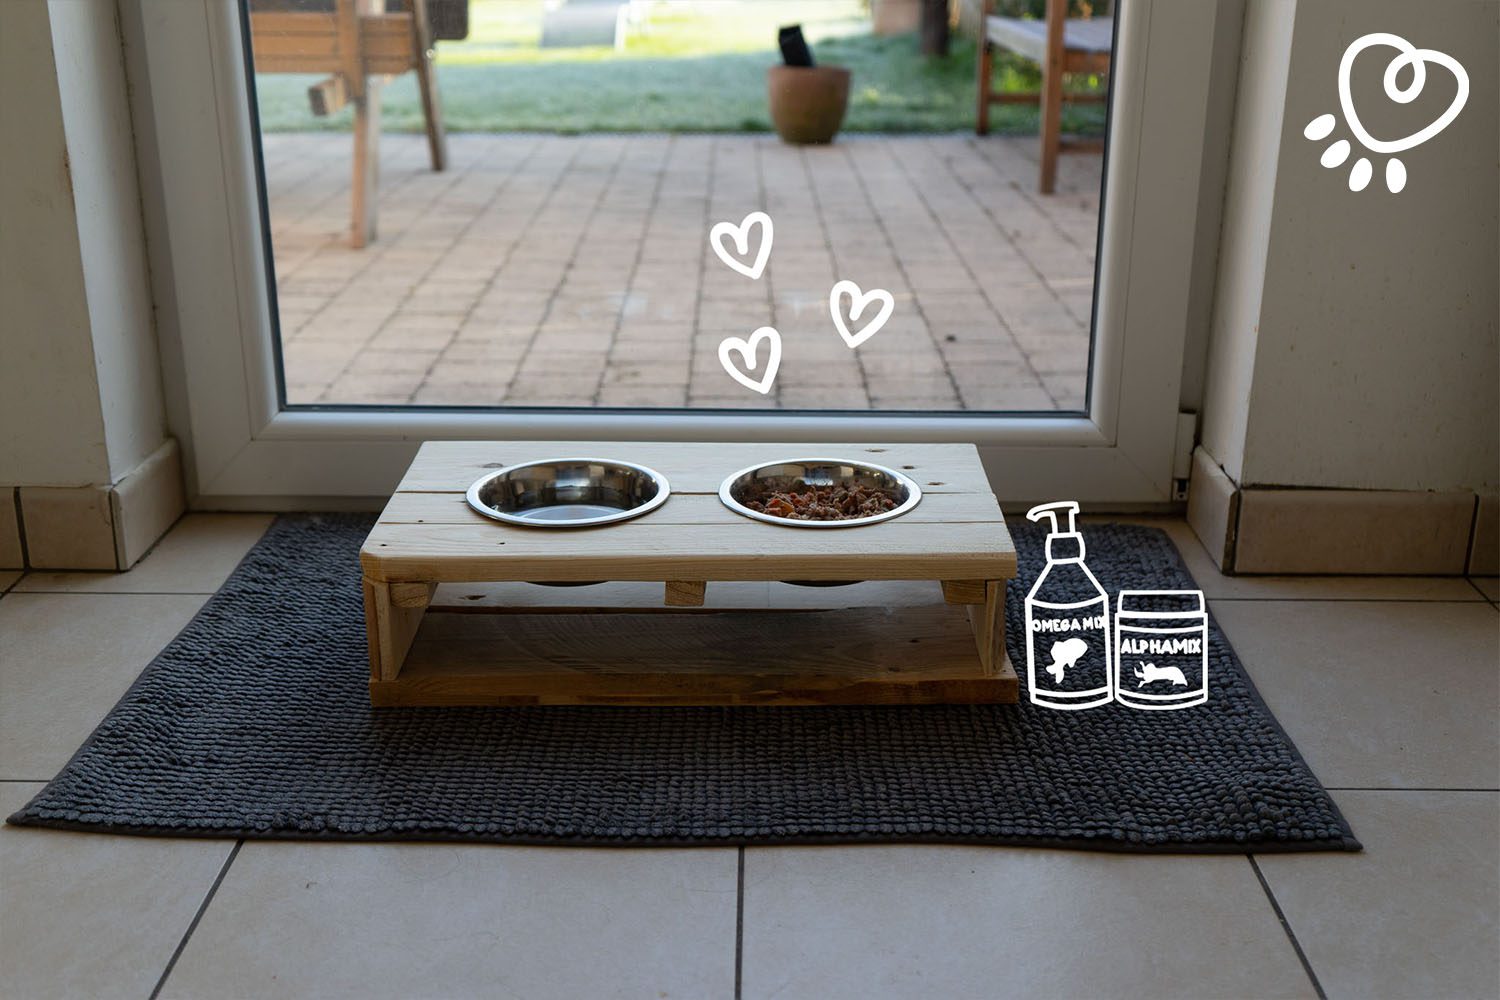
For April, we give you the chance to create a home-made bowl holder from salvaged wood. All colours, sizes and materials are possible. For this tutorial, we used salvaged pallets from EURO PALETTE.
As its name suggests, the bowl holder, or dog bar, is used to lift the bowls of our furry friends off the floor. The advantages of this are various:
Cost: €
Difficulty level: 3/5
Time needed: about 4 hours
The dimensions of this bowl holder have been calculated for a cocker spaniel, feel free to adapt the dimensions to the size of your dog. The ideal height for your bowl holder is the height of your dog’s shoulder.
The bowls in our tutorial are 16 cm in diameter.
If you are using pre-cut wooden planks, go directly to step 2

Once your pallet is dismantled, keep 3 of the widest boards for your structure as well as another board of any width (used to strengthen the structure).
For the surfaces: draw a first line at 50 cm and a second 50 cm further along on 2 of your 3 wide boards
For the sides: draw a line each 10 cm, so you will have a total of 4 lines on your last wide board

Then saw your planks where you marked your lines.
In total, you will now have 4 boards of 50 cm and 4 boards of 10 cm

Now is the time to pull out the compass! Measure a radius of 15 cm and draw a circle directly on your boards using your compass.

Cut: Take the last board and cut 3 battens 27 cm long by 3 cm wide

Place: the first batten on the left, 2cm from the edge, the second in the middle and the third on the right, 2cm from the edge.

Screw: each of the battens directly to the surface.

Use the jigsaw to follow the circle you drew previously with the compass. It’s okay if the circle isn’t perfect. The most important thing is that the hole is not too big (so the bowls cannot drop through).

You will need the 4 boards of 10cm length for this step.
Attach the first two boards directly to the battens so that they form a right angle with the top. Repeat for the other side.

Take the last 2 boards of 50 cm in length and screw them directly onto the boards on the side of your structure

Lightly sand the bowl holder to remove any splinters that could injure your dog.

For better hygiene, we recommend that you varnish the bowl holder so that it can be cleaned more easily and to prevent dirt from getting stuck in it.

Votre navigateur est obsolète!
Mettez à jour votre navigateur pour afficher correctement ce site Web. Download Google Chrome